Mounting a new drive in PopOS (or any Ubuntu OS)
If you’re like me, you’re relatively new to using Linux. As such, some of the most basic commands seem confusing until repeated dozens of times. Since installing new drives rarely happens, this is a highly perishible task for me. Hence, this post.
I need to cover some background info before we jump into the how-to part of this post.
You only need to mount a drive if it’s a permanent storage device in your computer. For external/removable storage like SD cards and USB thumb drives, Linux uses a system service called udisksd that runs in the background. Udisksd detects when a new storage drive is is connected via USB, inserted into a SD card reader, and when optical drives get installed.
How can you tell if your external storage device used udisksd? From the Files app, you’ll see the usual eject icon next to it.
Important - please read!
Assumptions: I’m going to assume you have some experience with Linux - including using the terminal. You don’t have to be an expert (I’m not!) but you have to be familiar with it to understand this post. I’m also assuming your new storage device is already formatted and partitioned. I’ll create another post on how to format drives and which file system to use.
Instructions: When you see <some-text>, that means you should type in whatever your device’s info is. Remove the < and >. They should not be included in any commands unless explicitly mentioned.
Instructions
Step 1: Create a new mount point
The first thing we need to do is open a terminal and create a new directory for the new drive to bind to.
# Type in the following:
username@computer-name:~$ sudo mkdir /mnt/<your-directory-name>
# Once that's done, verify the new directory exists:
username@computer-name:~$ ls /mnt | grep <your-directory-name>Hopefully you see your new directory and that step was successful for you. Moving on!
Step 2: Find the UUID and file system type of your new drive
We’re setting this up so whenever you insert this drive (if it’s a removable USB or SD), it’ll automatically mount the same way. To do that, we need the drive’s UUID and file system type. UUID stands for Universally Unique IDentifier and is used in computer systems to identify device info similar to Microsoft’s GUID (Globally Unique IDentifier). The file system type can vary depending on how you formatted the device. Your drive will likely have ext4, fat32, or ntfs.
Here’s how you find the UUID and file sytem type of your drive.
IMPORTANT: make sure it’s plugged into your computer first!
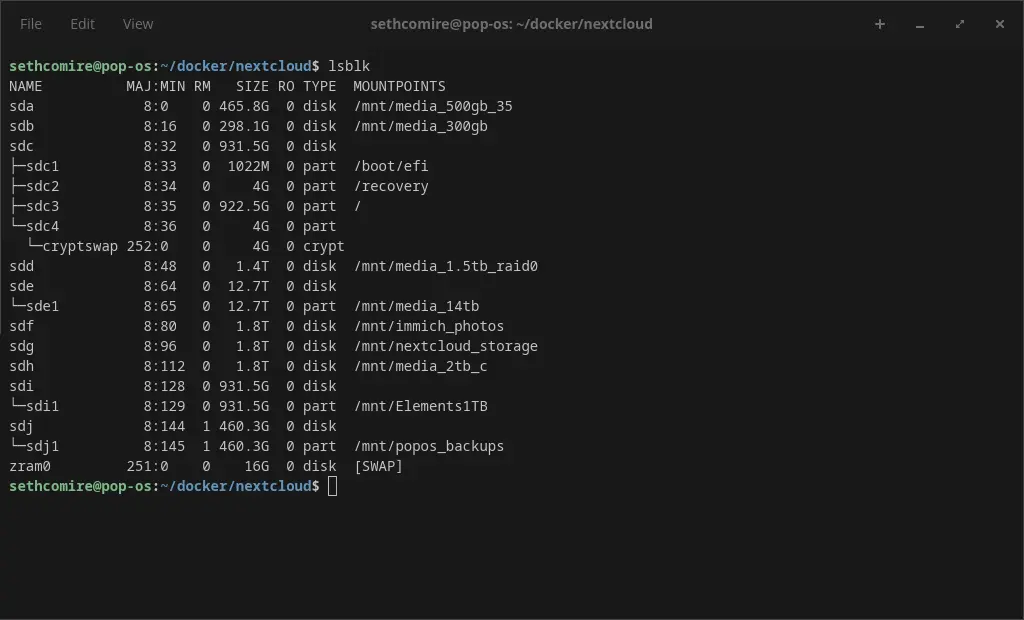
username@computer-name:~$ lsblk -flsblk is a command that’s short for “list block devices” which displays hard drives, solid-state drives, and other storage-related devices. You can use lsblk on it’s own without the -f option but it won’t show the UUIDs of each device (which we need).
Go ahead and copy the UUID and file system type associated with your drive. If you’re having trouble figuring out which is the one associated with your drive, check the size and ensure it’s a match. If you have more than one device listed with the same size, simply unplug your device and re-run the lsblk -f command and see which one is missing.
Your drive will likely be the last one listed alphabetically. In my case, I have many storage devices connected to my computer (sda - sdi) so when I plugged in my new USB drive, it showed up as sdj.
Step 3: Adding the new storage device to /etc/fstab
Now that we have the UUID and file system type of our new storage device, we need to add it to a file called ‘fstab’. fstab stands for “file system table.” It describes the filesystems that should be mounted, where they should be mounted, and what options they should be mounted with.
# To edit the fstab file, type this into your terminal:
username@computer-name:~$ sudo nano /etc/fstab
Once the nano text editor opens the file, arrow all the way down to the end of the last line and hit enter, creating a new line for us to type in the info for our new device.
# Here's what you'll add:
UUID=<your-UUID>      /mnt/<your-directory-name>      <your-file-system-type>    rw,noatime,nofail,x-gvfs-show   0 2
For example, I added UUID=6c2a0997-92ca-42f9-8c44-f058cd3b5dd7 /mnt/popos_backups ext4 rw,noatime,nofail,x-gvfs-show 0 2 to my fstab because my device’s file system type is ext4.
Yours could be ntfs if it was originally used on a Windows device. If that’s the case, the only way I successfully mounted ntfs drives on my system was by typing ntfs-3g as the file system type in fstab, not ntfs.
Once that’s done, press the CTL+X buttons together to save the changes, then hit Enter to keep the file name unchanged.
Step 4: Reloading the systemctl daemon to use the updated fstab
Linux doesn’t automatically detect the changes to the fstab file so we have to force a reload of the daemon. It’s super easy to do.
# From a terminal, type the following:
username@computer-name:~$ sudo systemctl daemon-reload
Step 5: Remount all Devices
Now that our computer reloaded the daemon and sees the updated fstab, we need to make sure our drives see those changes too - especially the new one.
# From a terminal, type the following:
username@computer-name:~$ sudo mount -a
The mount command tells the computer to bind the physical device in the /dev directory to the virtual mount point (the directory we created in step 1). The -a options tells the computer to mount all devices listed in the fstab.
Step 6: Verify the Device is Mounted
While you’re still in the terminal, run that lsblk -f command again. This time, you should see /mnt/<your-directory-name> show up in the ‘MOUNTPOINTS’ column. Now all you need to do is run this command in the terminal to access the new drive:
username@computer-name:~$ cd /mnt/<your-directory-name>Your terminal prompt should change to:
username@computer-name:~/mnt/<your-preferred-name>$Conclusion
If you run into any issues, definitely leave a comment on this post and I’ll be happy to help further!